Build Mail
MailMessage
MailMessage class provides multiple APIs which you can use to build your mails.
This package currently is built on mjml-react.
Built-In Template
Building mails doesn't have to be difficult and time-consuming, that's why Mailman ships with a set of mail builder APIs that makes it easier to build mails without having to define views for every mail that the system rolls out.
We ship an in-built template that you can use for all your transactional and internal communication emails. A sample usage of a mail built with builder APIs,
import { MailMessage } from "@squareboat/nest-mailman";

export class TestmailService {
  toMail() {
    const mail = MailMessage.init()
      .greeting("Hello Piyush 👋")
      .line("Thank you for choosing this package to deliver your mails. ")
      .line("We cannot wait you see build with this package. 🫶")
      .table([
        { website: "Squareboat", href: "https://squareboat.com" },
        { website: "Github", href: "https://github.com/squareboat" },
      ])
      .action("View Docs", "https://squareboat.com/")
      .subject("Hey there from Squareboat");
  }
}
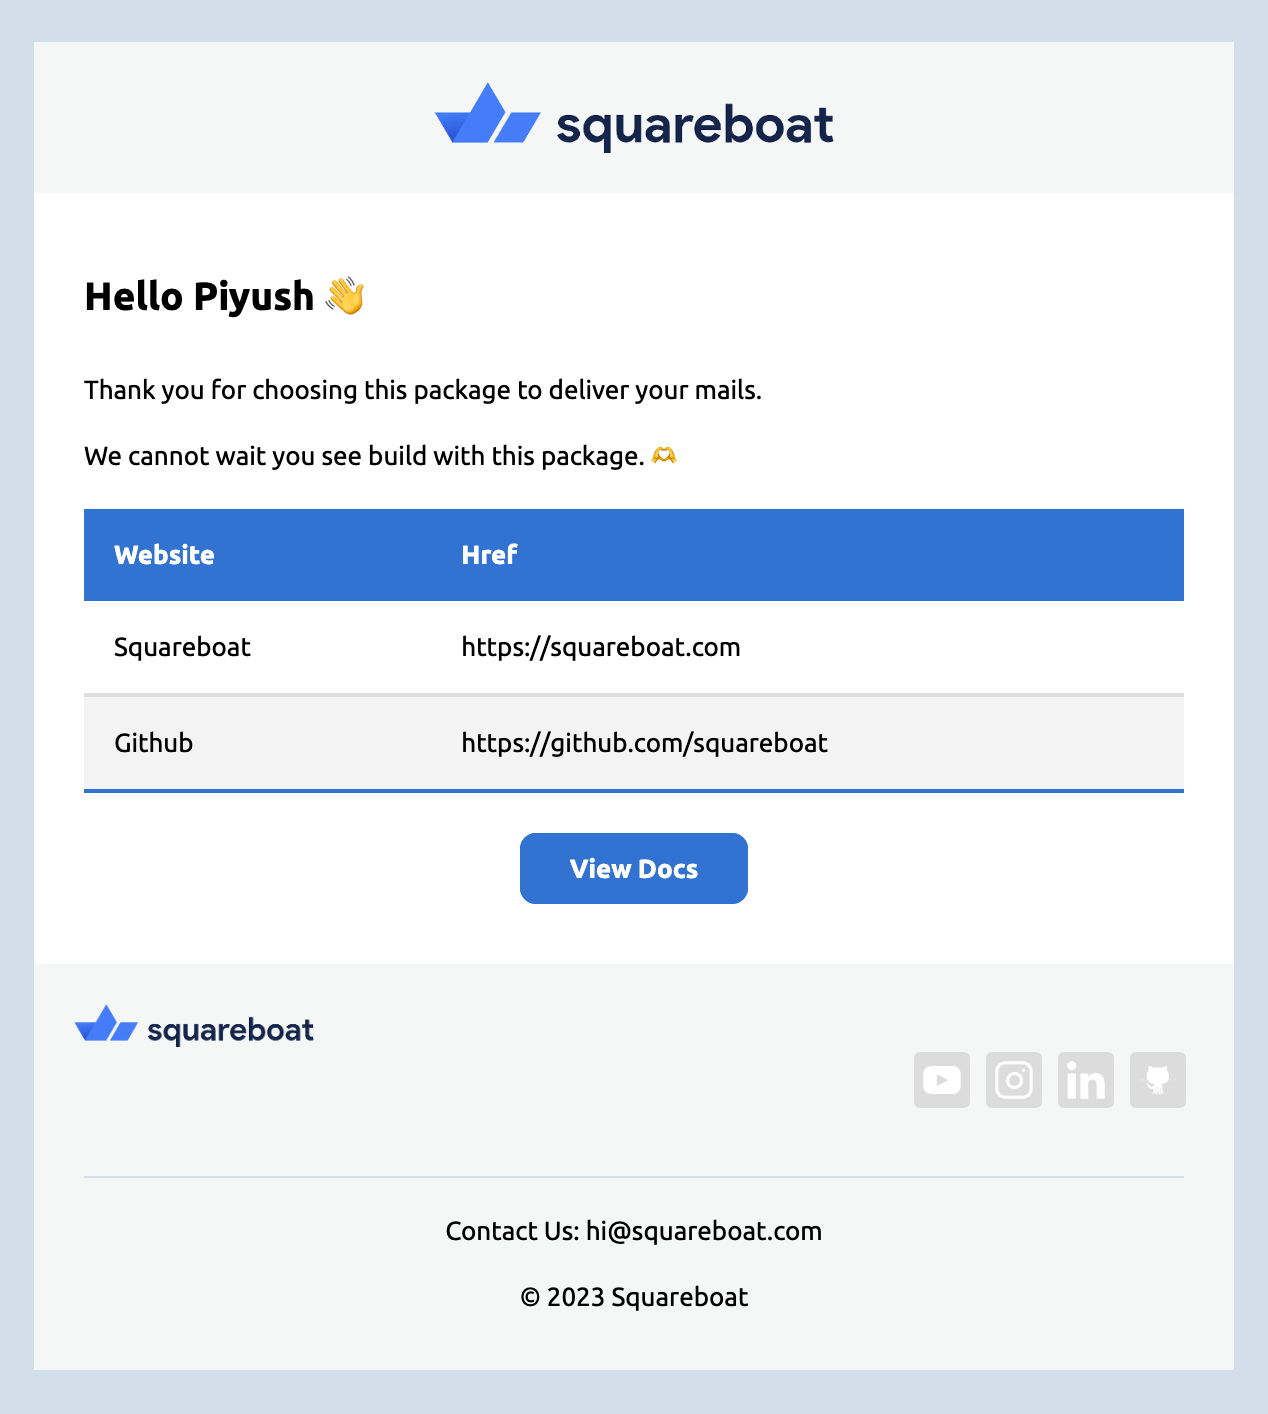
The above snippet will generate the following view:

Cool, right! 😎
Here is a list of the available handy methods (We are working on improving these so that they are more flexible and customizable.)
| Method | Description |
|---|---|
| greeting(text) | Sets the greeting for a mail. Rendered with a <h1> tag |
| line(text) | Adds text wrapped with a line break |
| action(text, link) | Renders a link as a button anchoring the passed text. We value accessibility and so every action also adds the link as a fallback just in case the link is not properly rendered |
| table (rows[]) | Renders a table |
| divider | Prints a divider |
| subject | Sets the mail's subject line |
| meta.title | Title of the mail if and when rendered in browser |
| meta.preview | Summay to be shown in user's inbox |
Templating
We have added the support for JSX elements, ie React Components (built on top of mjml components), to make the development of mail feel like breeze.
MJML
MJML is the framework for building responsive e-mails. And we couldn't have gotten far in Mailman without this. If you are new to MJML, do check out their documentation at mjml.io
We start off by creating a .mjml file and specifying the filename to the same old view() method of MailMessage
const user = { name: 'Anubhav Jain' };
const mail = MailMessage.init()
    .subject('Introduing our newsletter');
    .view(CustomMjmlComponent, {name:'Vinayak'})
Raw Template Strings
Sometimes our mails are small enough and do not need to be defined in a separate template file. For such cases, you can simply use the raw() method, with the template string and payload.
const user = { name: 'Nihal Arya' };
const mail = MailMessage.init()
    .subject(`${user.name}, welcome to our platform!`);
    .raw(`Hello ${user.name}, <br />Welcome to our platform!<br />Thank you!`)
Attachments
To attach file(s) with your email, you can make use of attach() method.
| Parameter | Description |
|---|---|
| filename | filename to be reported as the name of the attached file. |
| content | Attachment Object |
mail.attach("license", {
  path: "https://raw.githubusercontent.com/squareboat/nest-mailman/main/LICENSE.md",
});
Subject
To set the subject for the mail, you can call the subject('MAIL SUBJECT') method on mailMessage.
mail.subject("Invoice #12345 has been paid. Yay!");
Debugging Mails
Sometimes, you may want to see the final template that will be built out of the mail object.
This can be extremely helpful to check if your mail is using the dynamic content as intended. Another quick usage is to check the HTML rendered by calling the various Mail builder methods.
You can do so by calling the render method, which returns the complete HTML string that will be sent in the mail.
const mail = MailMessage.init().greeting("Hello there");

console.log(mail.getMailData().html); // prints the html of the mail generated by mjml
Custom MailMessage
While MailMessage on its own is sufficient in most cases, there can be situations where you may want to add some piece of logic that is specific to a mail. To solve this, you can subclass MailMessage and add in methods on top of MailMessage.
For this to work, you need to implement the handle() method, which will return the mail body.
import { MailMessage } from "@squareboat/nest-mailman";

export class InvoicePaid extends MailMessage {
  constructor(private order: Record<string, any>) {
    super();
  }

  handle(): this {
    // write any business logic that you may want to add here
    return this.greeting("Hello admin")
      .line(`One of your invoices ${this.order.id} has been paid!`)
      .action("Check invoice", "https://squareboat.com")
      .line("Please let us know if you are facing any issue!")
      .subject(`INVOICE PAID: ${this.order.id}`);
  }
}